Documentation Index
Fetch the complete documentation index at: https://docs.coffeerms.com/llms.txt
Use this file to discover all available pages before exploring further.
Client Master Workflow
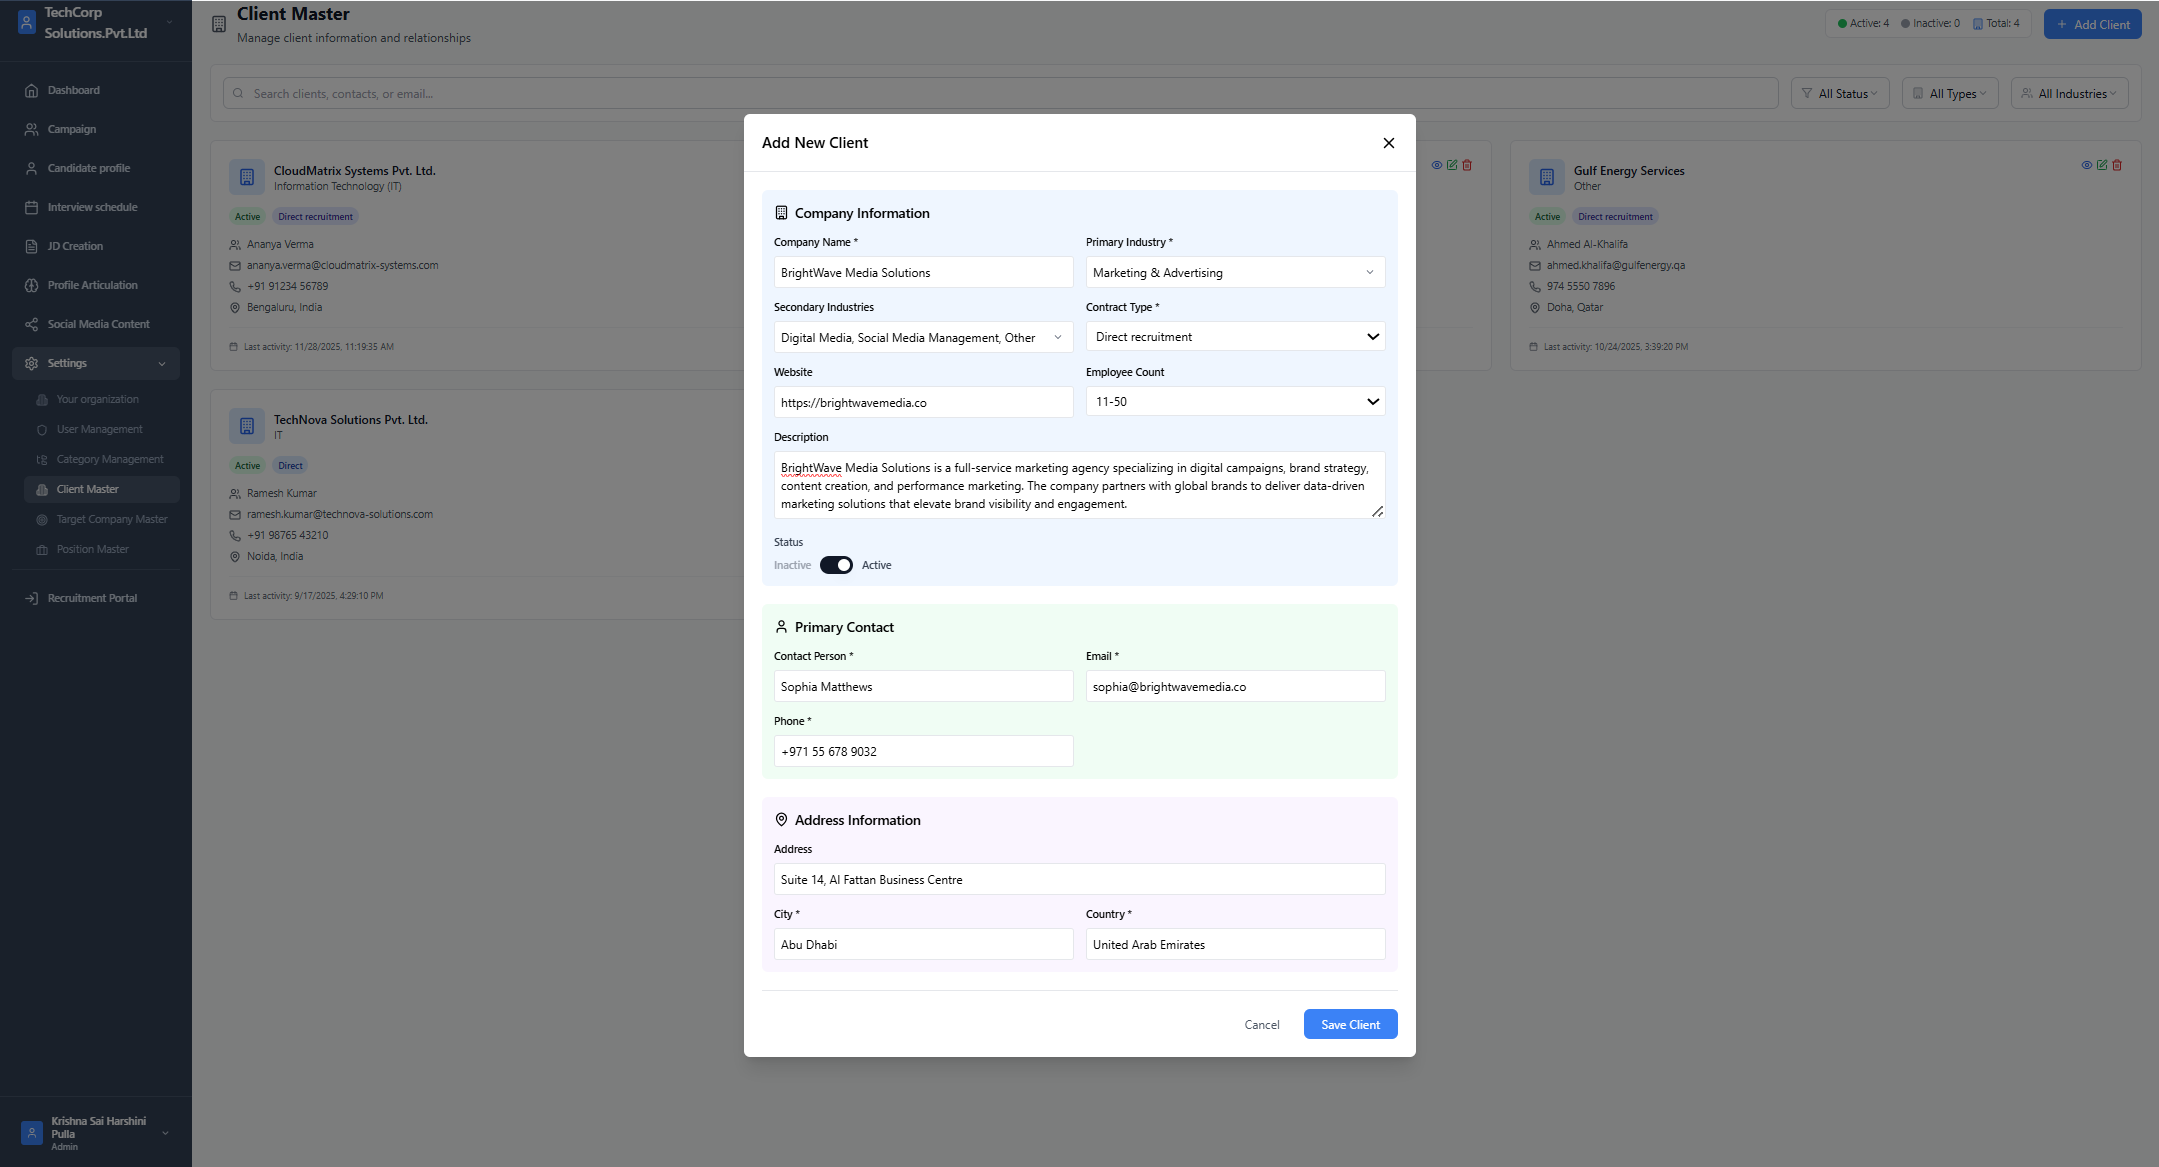
This workflow describes how admins manage client companies inside the RMS.Add Client
- Click Add Client
- Fill required fields:
- Company Name
- Industry
- Relationship Type
- Contact person, email, phone
- Location
- Set Status (Active / Inactive)
- Save the client
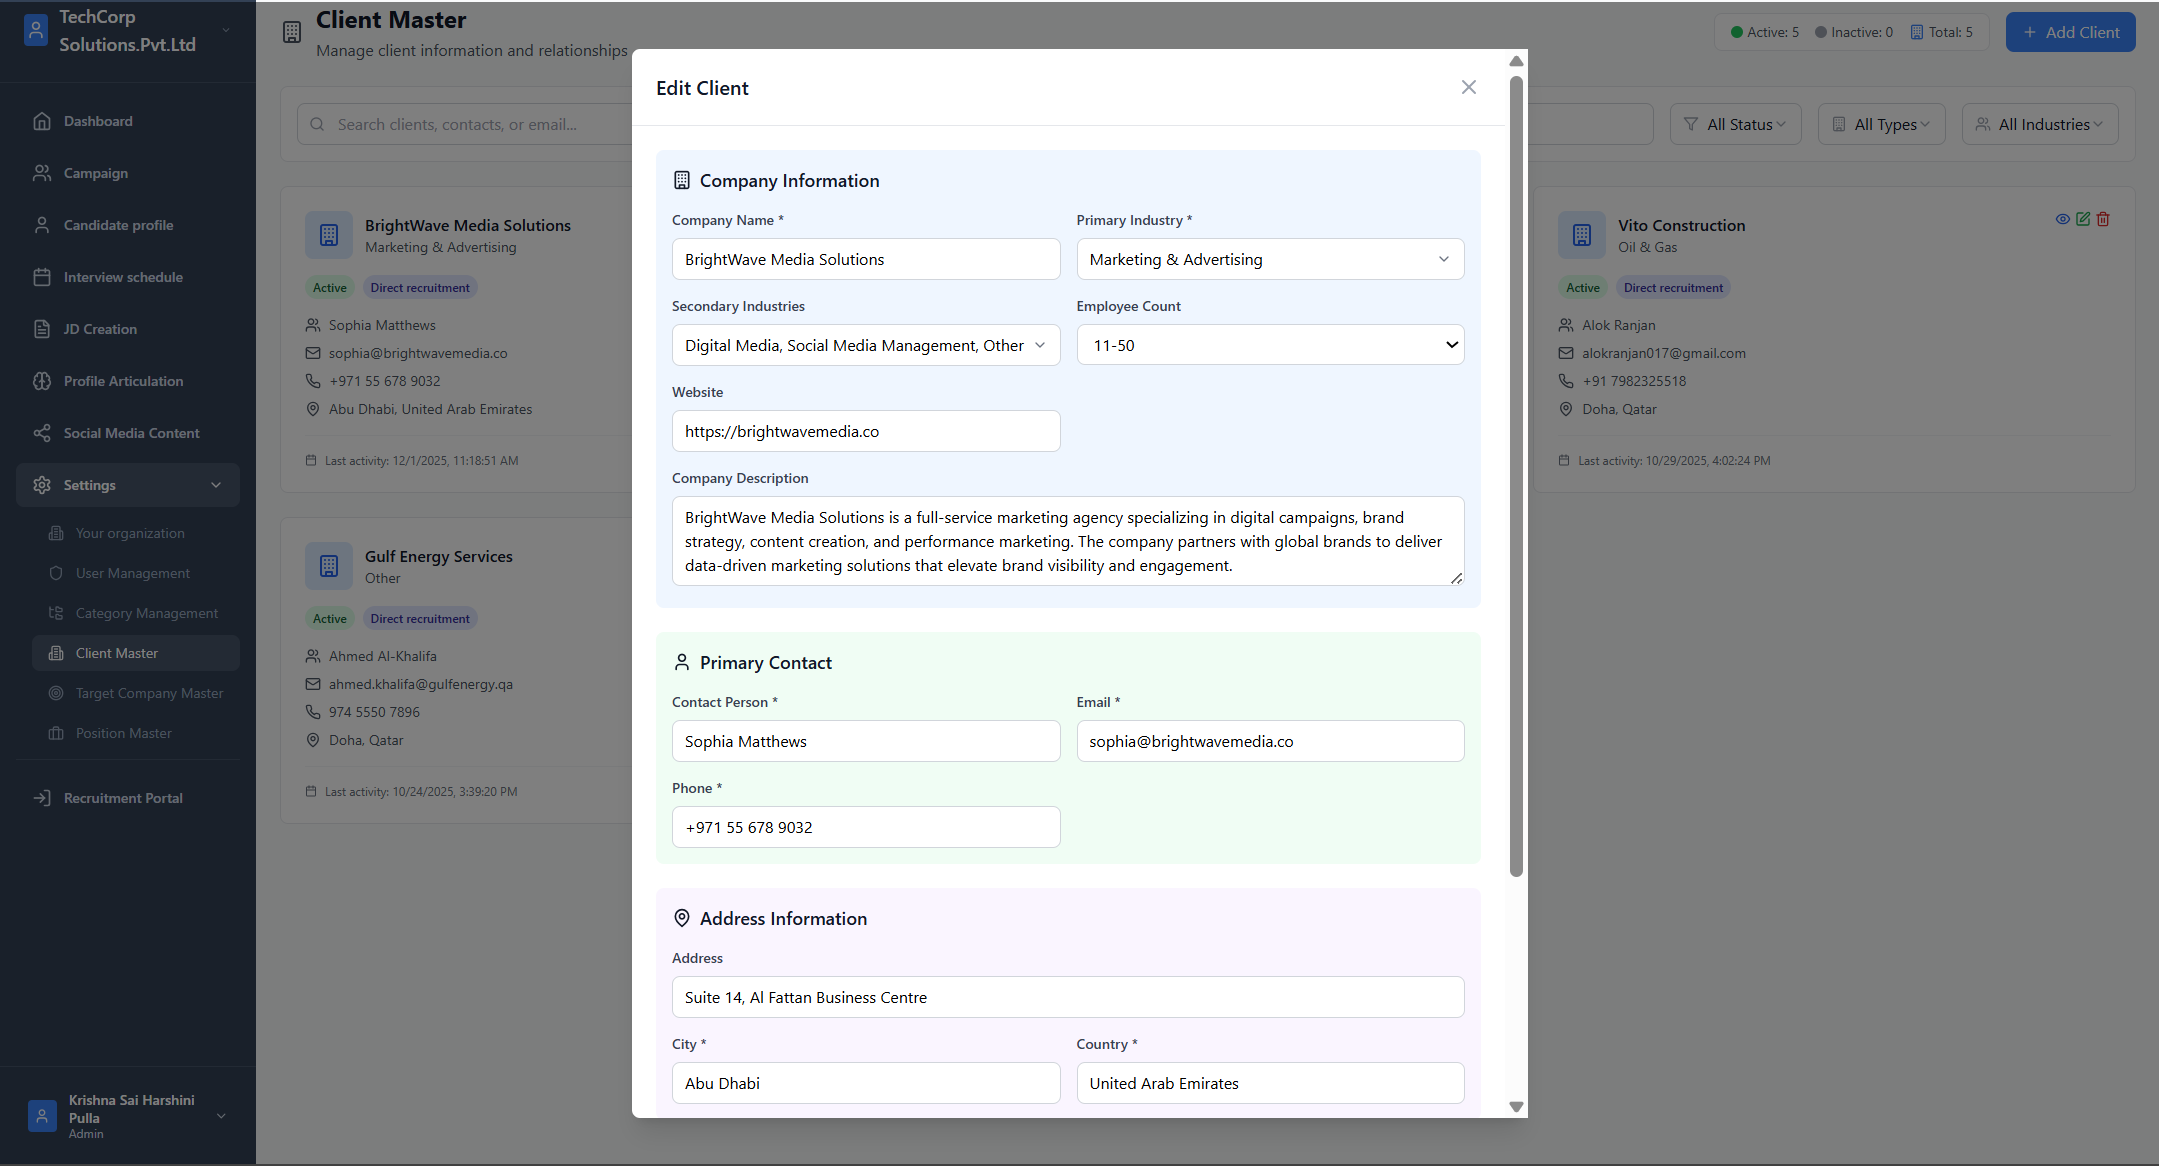
Edit Client
- Click Edit on any client card
- Update company name, industry, contact details, or relationship type
- Save changes
View Client
- Click View (eye icon)
- View full details: industries, contacts, website, description, activity logs

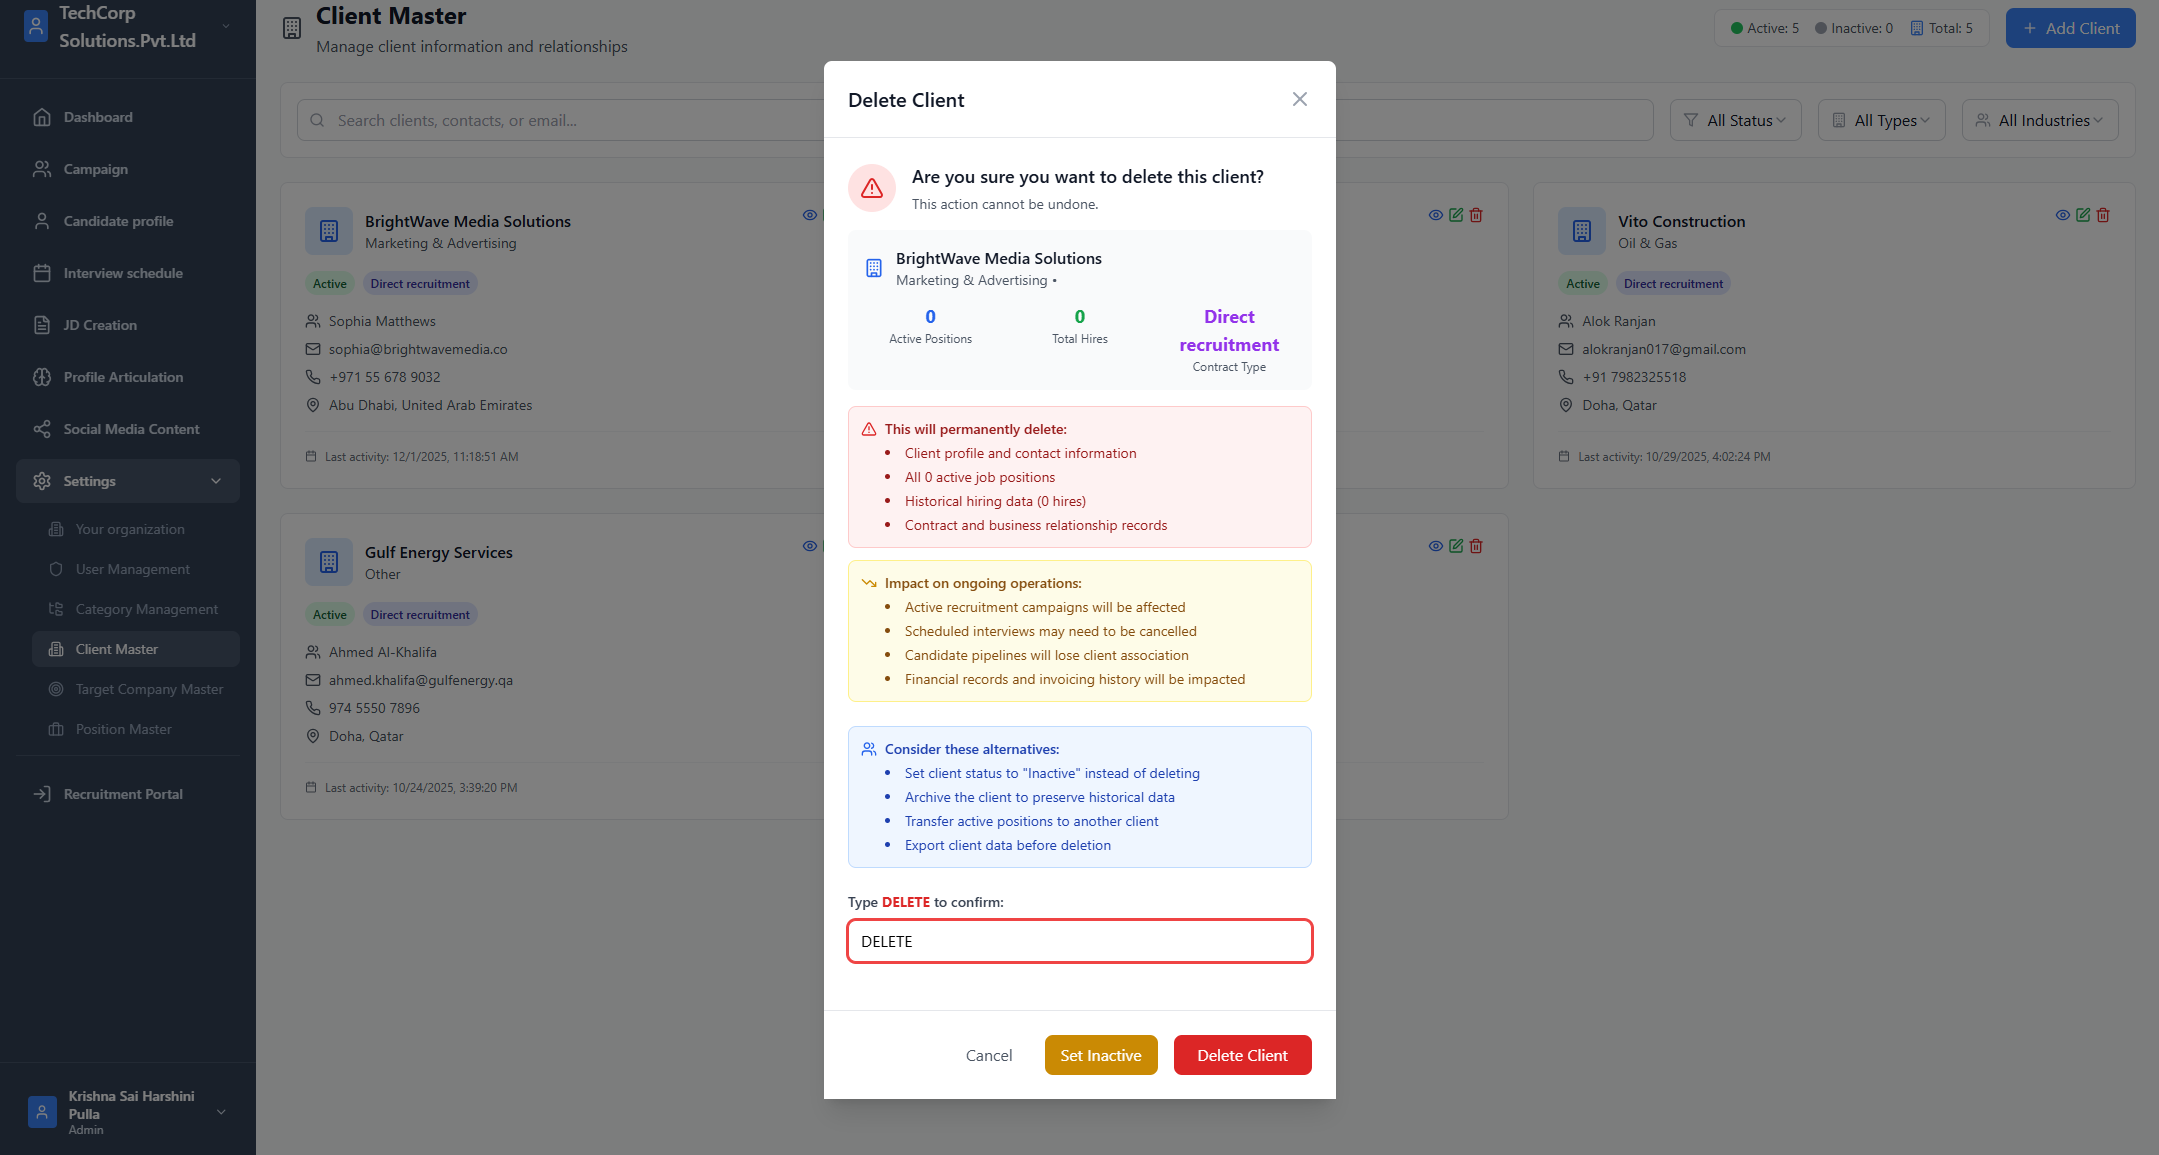
Delete Client
- Click Delete
- Confirm deletion
- Client is removed if not linked to critical active items
Search & Filter
You can filter by:- Status (Active / Inactive)
- Relationship Type (Direct, Direct Recruitment)
- Industry (IT, Oil & Gas, etc.)
- Company name
- Contact name

How It Fits With Other Modules
JD Creation
- Company dropdown is populated from Client Master
- Selecting a client auto-fills the company email
Campaign Creation
- Campaign inherits company name/email from Client Master if missing
Profile Articulation
- If JD has no companyEmail → fallback to Client Master
Summary
Client Master is the central directory of all client companies.All JDs, Campaigns, Positions, and Profiles depend on this module to ensure consistent and accurate company data across the RMS.